c. Set up Batch Resources
In this step, you set up an AWS Batch Compute Environment and Job Queue via infrastructure as code using AWS Cloudformation.
Compute environments can be seen as computational clusters. They can consist of one or several instance kinds or just the number of cores you want in the environment. For more information on the compute environments, see Compute Environments.
The Job Queue is where you submit your jobs. These jobs are dispatched to the compute environment(s) of your choosing by order of priority. If you want to learn more about job queues, see Job Queues.
Run the following commands on your Cloud9 terminal
- Copy the Cloudformation template which will be used to create the AWS Batch Compute Environment and Job Queue.
aws s3 cp s3://sc21-hpc-labs/sc21-nextflow-batch-ce-jq.template.yaml .
- Set the following environment variables to be passed as parameters to the Cloudformation stack.
- AWS_REGION - Specifies the AWS region to create the AWS Batch resources.
- VPC_ID - Specifies a virtual network to deploy AWS Batch resources.
- SUBNET_IDS - Specifies the subnets you want your batch compute environment to launch in.
AWS_REGION=$(curl --silent http://169.254.169.254/latest/meta-data/placement/region)
echo "export AWS_REGION=${AWS_REGION}"

VPC_ID=`aws ec2 describe-vpcs --output text --query 'Vpcs[*].VpcId' --filters Name=isDefault,Values=true --region ${AWS_REGION}`
echo "export VPC_ID=${VPC_ID}"

SUBNET_IDS=`aws ec2 describe-subnets --query "Subnets[*].SubnetId" --filters Name=vpc-id,Values=${VPC_ID} --region ${AWS_REGION} --output text | sed 's/\s\+/,/g'`
echo "export SUBNET_IDS=${SUBNET_IDS}"
- Deploy the Cloudformation template to create the Batch Compute Environment and Job Queue.
aws cloudformation deploy --stack-name nextflow-batch-ce-jq --template-file sc21-nextflow-batch-ce-jq.template.yaml --capabilities CAPABILITY_IAM --region ${AWS_REGION} --parameter-overrides VpcId=${VPC_ID} SubnetIds="${SUBNET_IDS}"
- It will take a few mins for the stack to be created. Once complete you will see a message as below:
Waiting for changeset to be created..
Waiting for stack create/update to complete
Successfully created/updated stack - nextflow-batch-ce-jq
-
Verify that the Batch resources are created successfully. In the AWS Management Console, in the search bar, search for and choose Batch
-
In the left pane, choose Compute environments option and confirm that a Compute environment nextflow-ce is created. Make sure Status is VALID and State is ENABLED. Refresh to check the Status updates.

-
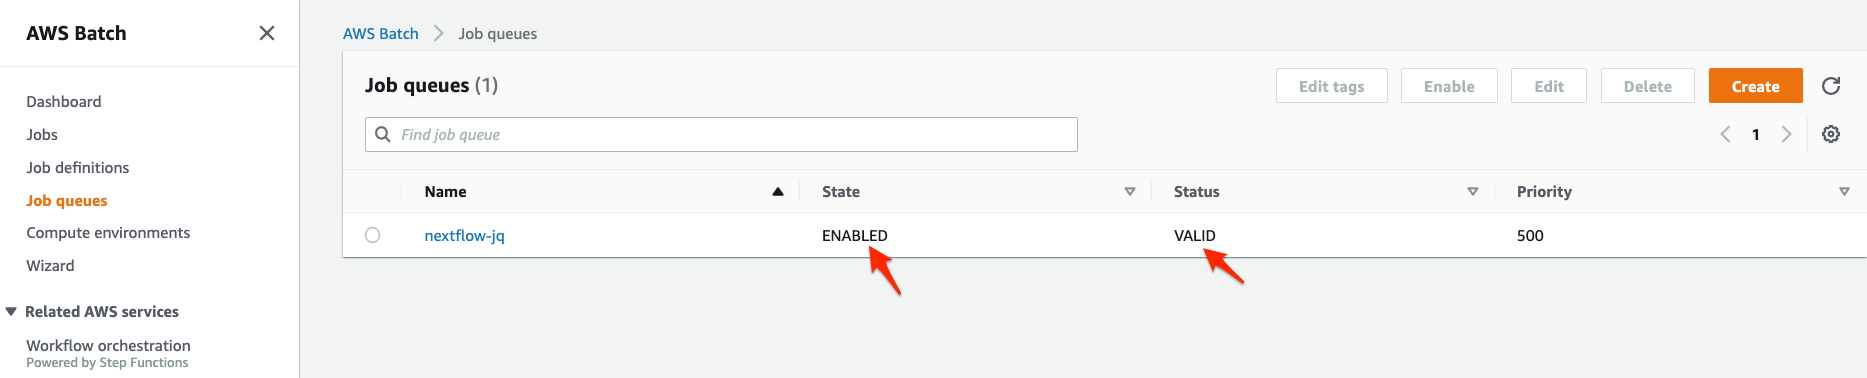
Similarly, In the left pane choose Job queues section and confirm that a Job Queue nextflow-jq is created. Make sure State is ENABLED and Status is VALID
At this point, you have done the hard part! Continue to set up the job definition.
Highly recommended to examine the contents of the downloaded Cloudformation template (sc21-nextflow-batch-ce-jq.template.yaml) to understand the usage of infrastructure as code to create the Batch resources in this section.