f. Submit a tightly coupled HPC job
The steps here can also be executed on any cluster running SLURM. There may be some variations depending on your configuration.
In this step, you run the WRF CONUS 12km test case job to introduce you to the mechanisms of AWS ParallelCluster.
Preparatory Steps
Make sure that you are logged into the AWS ParallelCluster head node through the AWS Cloud9 terminal.
Download CONUS 12KM
Input data used for simulating the Weather Research and Forecasting (WRF) model are 12-km CONUS input. These are used to run the WRF executable (wrf.exe) to simulate atmospheric events that took place during the Pre-Thanksgiving Winter Storm of 2019. The model domain includes the entire Continental United States (CONUS), using 12-km grid spacing, which means that each grid point is 12x12 km. The full domain contains 425 x 300 grid points. After running the WRF model, post-processing will allow visualization of atmospheric variables available in the output (e.g., temperature, wind speed, pressure).
On the HPC Cluster, download the CONUS 12km test case from the NCAR/MMM website into the /shared directory. /shared is the mount point of NFS server hosted on the head node.
Here are the steps:
cd /shared
curl -O https://sc21-hpc-labs.s3.amazonaws.com/wrf_simulation_CONUS12km.tar.gz

tar -xzf wrf_simulation_CONUS12km.tar.gz
For the purpose of SC21, a copy of the data that can be found on UCAR website through this link has been stored in a S3 bucket.
Prepare the data
Copy the necessary files for running the CONUS 12km test case from the run directory of the WRF source code. A copy of the WRF source code is part of the AMI and located in /opt/wrf-omp/src.
cd /shared/conus_12km

cp /opt/wrf-omp/src/run/{\
GENPARM.TBL,\
HLC.TBL,\
LANDUSE.TBL,\
MPTABLE.TBL,\
RRTM_DATA,\
RRTM_DATA_DBL,\
RRTMG_LW_DATA,\
RRTMG_LW_DATA_DBL,\
RRTMG_SW_DATA,\
RRTMG_SW_DATA_DBL,\
SOILPARM.TBL,\
URBPARM.TBL,\
URBPARM_UZE.TBL,\
VEGPARM.TBL,\
ozone.formatted,\
ozone_lat.formatted,\
ozone_plev.formatted} .
Run the CONUS 12Km simulation
In this step, you create the SLURM batch script that will run the WRF CONUS 12km test case on 72 cores distributed over 2 x c5n.18xlarge EC2 instances.
cat > slurm-c5n-wrf-conus12km.sh << EOF
#!/bin/bash

#SBATCH --job-name=WRF-CONUS12km
#SBATCH --partition=c5n18large
#SBATCH --output=%x_%j.out
#SBATCH --error=%x_%j.err
#SBATCH --ntasks=72
#SBATCH --ntasks-per-node 36
#SBATCH --cpus-per-task=1


export I_MPI_OFI_LIBRARY_INTERNAL=0
export I_MPI_OFI_PROVIDER=efa

module purge
module load wrf-omp/4.2.2-intel-2021.3.0

mpirun wrf.exe
EOF
Submit your First Job
Submitted jobs are immediately processed if the job is in the queue and a sufficient number of compute nodes exist.
If there are not enough compute nodes to satisfy the computational requirements of the job, such as the number of cores, AWS ParallelCluster creates new instances to satisfy the requirements of the jobs sitting in the queue. However, note that you determined the minimum and maximum number of nodes when you created the cluster. If the maximum number of nodes is reached, no additional instances will be created.
Submit your first job using the following command on the head node:
sbatch slurm-c5n-wrf-conus12km.sh
Check the status of the queue using the command squeue. The job will be first marked as pending (PD state) because resources are being created (or in a down/drained state). If you check the EC2 Dashboard, you should see nodes booting up.
squeue
When ready and registered, your job will be processed and you will see a similar status as below.

You can also check the number of nodes available in your cluster using the command sinfo. Do not hesitate to refresh it, nodes generally take less than 5 min to appear.
sinfo
The following example shows 2 nodes.

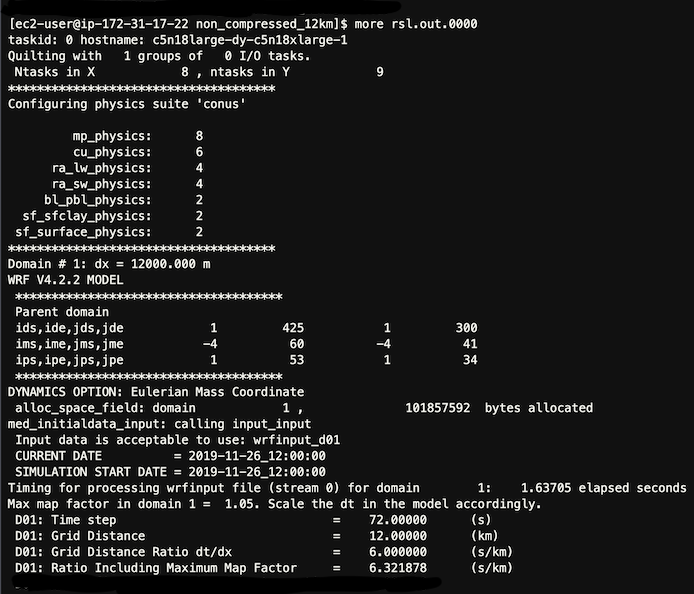
Once the job has been processed, you should see similar results as follows in one of the rsl.out.* files:
Look for “SUCCESS COMPLETE WRF” at the end of the rsl* file.

Done!
After a few minutes, your cluster will scale down unless there are more job to process.
Exit the HPC Cluster
exit